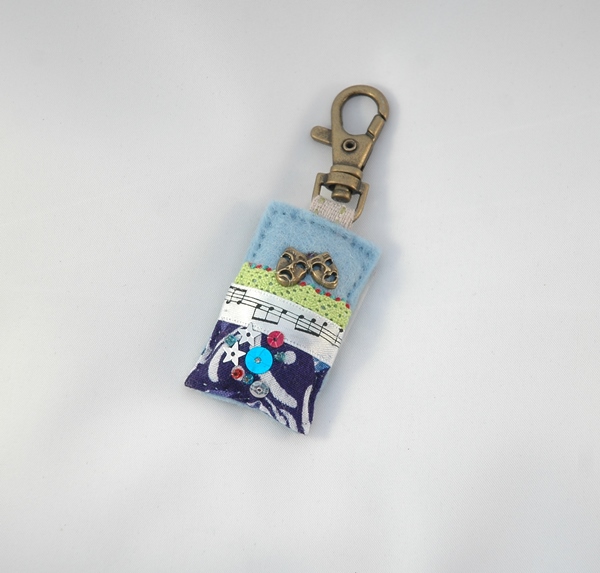
Finally, after 9 years, my own website is up and running! You can find all my unique hand sewn items here:
Showing posts with label Ellie's Treasures: general. Show all posts
Saturday, 23 January 2021
Thursday, 28 September 2017
"Just a Card Day"
Today is a special day for those that support the "Just A Card" campaign. Set up by artist and designer Sarah Hamilton, the campaign helps to promote awareness of supporting small creative businesses. The campaign got its name when Sarah saw a quote by store keepers at a gallery that had sadly had to close - "if everyone who'd complimented our beautiful gallery had bought "just a card" we'd still be open".
Many people who browse the work of independent artists and designers perhaps haven't thought about the amount of time, energy and cost that goes into producing their unique creations. On top of this there are also fees to exhibit their goods, whether in a gallery, fair, shop or online. For me, every sale, however small, that I receive has not only helped me financially but has boosted my confidence to stay on my creative path. Each sale whispers that someone believes in me and my work and this belief encourages me to continue to design and sew new items for Ellie's Treasures.
By supporting independent small business, you will not only be putting a smile of appreciation on the face of the seller but also on the face of the receiver as they realise they have not only purchased something special, they have also helped to strengthen the community of unique small business owners and independent artists and makers.
If you would like to support "Just A Card" please click the logo at the side of my blog for more information. You can also following "Just A Card" on instagram and twitter.
Many people who browse the work of independent artists and designers perhaps haven't thought about the amount of time, energy and cost that goes into producing their unique creations. On top of this there are also fees to exhibit their goods, whether in a gallery, fair, shop or online. For me, every sale, however small, that I receive has not only helped me financially but has boosted my confidence to stay on my creative path. Each sale whispers that someone believes in me and my work and this belief encourages me to continue to design and sew new items for Ellie's Treasures.
By supporting independent small business, you will not only be putting a smile of appreciation on the face of the seller but also on the face of the receiver as they realise they have not only purchased something special, they have also helped to strengthen the community of unique small business owners and independent artists and makers.
If you would like to support "Just A Card" please click the logo at the side of my blog for more information. You can also following "Just A Card" on instagram and twitter.
Wednesday, 15 March 2017
Open for business with 2017 goals
I've only managed to list a few of my items so far, but hopefully in a short time my store will be fully stocked giving customers the choice of which marketplace they'd like to purchase from.
It finally feels like Winter is behind us as we experience a few pleasant Spring like days. Today has been glorious, so I grabbed the opportunity to taking my cuppa and planning diary outside to work in the sunshine.
Trying to plan a little and set some goals is really helping to keep my motivation going. I did a blog post on this last year and have referred back to my 2016 intentions, goals, achievements quite regularly. So I've started planning a few events for 2017 - taking part in the Etsy Makers Spring Market a couple of weekends ago has opened my eyes to online craft events - it was hard work but great fun and I plan to do a few more during the year. I've also applied for a well known Norfolk Christmas market - a little daunting, but I'm keeping my fingers crossed I'll be accepted.
Labels:
Ellie's Treasures: fairs; markets; shops; features,
Ellie's Treasures: general,
Ellie's Treasures: new
Wednesday, 22 February 2017
Browsing and purchasing kind of day
Half term for Ben last week and as he asked to go into King's Lynn to have fun at the fair with his mates, it was a opportunity not to be missed to have a mooch around The Fent Shop in the town centre. Being perhaps the best haberdashery in the area, with row upon row of colourful fabrics, bundles and reels of ribbons, trims and pretty embellishments, you can forgive me for spending quite a long time browsing. They were selling mini packs of off-cut squares in just the tiny prints that I need for my work so with the helping assistance from one of the staff member sourcing just what I needed I came away with quite a good selection (together with some ribbon ... of course).
After a stop off at a well known coffee shop, downing two large mugs of tea and a delicious lemon and poppy seed muffin while I did a spot of online work, I headed off to TK Maxx. I don't usually wander into the home section, but had time to kill so took my time looking at what they had. Among the many books I found this absolute gem - The Shopkeeper's Home by Caroline Rowland. Full of wonderfully styled photos of shop floors and shopkeeper's homes, lots of inspiration and a perfect coffee table book.
Monday, 23 January 2017
Getting to grips with a light tent
Aiming to take good product shots is one (of many) challenges an online seller faces. When I look back at my first product photo on Folksy I absolutely cringe and wonder how on earth I managed to sell anything! I'm hoping my shop photography skills have come on a little since then and even, perhaps, since writing a blog post of this very subject nearly a year ago.
Three things have happened in this last year:
(1) I continually look at product shots from other sellers to get an understanding of how I personally like to see an item presented.
(2) I took part in a free online "introduction to your camera" course which I found extremely helpful with regard to using the camera in manual mode to achieve good results. It is my 2017 resolution to actually read the manual for our camera to understand it even better.
(3) I was given a light tent as a Christmas present.
So this post is about using the light tent. I'd been thinking about buying a light tent (or even making one) for some time. I'd read a lot about them, the ups and downs (mostly the downs) and initially came to the conclusion that actually I didn't need one as I take product shots in the conservatory which is flooded with light. However, I was spending an awful amount of time tweaking my photos once they'd been uploaded to the camera, so something was going wrong. Things improved considerably once I'd finished the photography course, but my constant whinging before this had obviously gone unnoticed by my son who, bless, presented me with a light box at Christmas ("it's something you said you needed")! Actually, the light box had to be returned - it would have been brilliant had it not kept collapsing. I exchanged it for a light tent.
The tent was from a seller on Ebay - there's loads to choose from with this set up and I read some good reviews. The tent folds up neatly into a carry bag which holds everything, including the background cloths (of which there are four, in different colours), two lights and a small table top camera stand.
The stand is good and sturdy but my DSLR is too heavy for it (I may well be using it incorrectly). I do already have an adjustable stand so this isn't an issue for me.
Some reviewers commented on how hot the lights became. Yes, they do, but I try to remember to turn them off during prolonged setting up and fiddling around sessions so they don't overheat - so far, so good. Another reviewer said they couldn't get the creases out of the backdrops. This didn't seem to be an issue for me, but I was silly enough to hold the iron on the fabric a little too long and have now got a bit of a hole close to where it attaches 😔. Luckily my items are so small it hasn't yet caused a problem - but be warned, iron over a tea-towel or something similar so as not to make the same mistake!
Playing with the tent was interesting. I've learnt that the set up shown above isn't the best way to get a good photo!
The lights need to shine through the sides of the tent giving a diffused light rather than a direct one.
Endeavouring to position my little items correctly to get the desired shot has been quite frustrating at times and at one point I was wondering whether all the faffing around was really worth it. However, with continuous playing I'm beginning to get to grips with how the tent will work for me. I use a folded/rolled sheet under the backdrop to get an slanted angle and place a good sized piece of white thin card on top as I find this gives a smoother background for my close up shots.
The following photographs show slight differences in lighting - non have been tweaked at all.
This was taken with the light towards the front, as direct light and with the cloth background. I was quite happy with this to start with, but after a white I realised I didn't like the soft waves of the cloth and also the shadows.
This shot has been taken without the lights. It's the kind of shot I was getting before I used the light tent and although it's OK, it would need a fair bit of adjustment before I was happy to use it.
There is a very subtle change in this photo compared to the one above. The background is very slightly brighter, thanks to the diffused light. The photo will still need tweaking to bring out the true colours of the item (it is still a puzzle to me why they are muted) but I'm a lot happier with the overall look.
For me, the light box produces the best results for lifestyle shots mainly because of the continuous length of cloth that gives a clean look. Moving the lights around (and even holding one or both above the light tent) really helps to achieve a nice light.
At times I'm still in two minds as to whether the light tent has been the Godsend I was hoping for, especially when I'm shooting on a sunny day in a room full of windows. However, on those very dull days, it has made a big difference.
I'm now finding it's hard for me to choose which photo I like best from a batch rather than which one will eventually look OK after lots of additional work - and that's a good thing 😊📷.
Three things have happened in this last year:
(1) I continually look at product shots from other sellers to get an understanding of how I personally like to see an item presented.
(2) I took part in a free online "introduction to your camera" course which I found extremely helpful with regard to using the camera in manual mode to achieve good results. It is my 2017 resolution to actually read the manual for our camera to understand it even better.
(3) I was given a light tent as a Christmas present.
So this post is about using the light tent. I'd been thinking about buying a light tent (or even making one) for some time. I'd read a lot about them, the ups and downs (mostly the downs) and initially came to the conclusion that actually I didn't need one as I take product shots in the conservatory which is flooded with light. However, I was spending an awful amount of time tweaking my photos once they'd been uploaded to the camera, so something was going wrong. Things improved considerably once I'd finished the photography course, but my constant whinging before this had obviously gone unnoticed by my son who, bless, presented me with a light box at Christmas ("it's something you said you needed")! Actually, the light box had to be returned - it would have been brilliant had it not kept collapsing. I exchanged it for a light tent.
The tent was from a seller on Ebay - there's loads to choose from with this set up and I read some good reviews. The tent folds up neatly into a carry bag which holds everything, including the background cloths (of which there are four, in different colours), two lights and a small table top camera stand.
The stand is good and sturdy but my DSLR is too heavy for it (I may well be using it incorrectly). I do already have an adjustable stand so this isn't an issue for me.
Some reviewers commented on how hot the lights became. Yes, they do, but I try to remember to turn them off during prolonged setting up and fiddling around sessions so they don't overheat - so far, so good. Another reviewer said they couldn't get the creases out of the backdrops. This didn't seem to be an issue for me, but I was silly enough to hold the iron on the fabric a little too long and have now got a bit of a hole close to where it attaches 😔. Luckily my items are so small it hasn't yet caused a problem - but be warned, iron over a tea-towel or something similar so as not to make the same mistake!
Playing with the tent was interesting. I've learnt that the set up shown above isn't the best way to get a good photo!
The lights need to shine through the sides of the tent giving a diffused light rather than a direct one.
Endeavouring to position my little items correctly to get the desired shot has been quite frustrating at times and at one point I was wondering whether all the faffing around was really worth it. However, with continuous playing I'm beginning to get to grips with how the tent will work for me. I use a folded/rolled sheet under the backdrop to get an slanted angle and place a good sized piece of white thin card on top as I find this gives a smoother background for my close up shots.
The following photographs show slight differences in lighting - non have been tweaked at all.
This was taken with the light towards the front, as direct light and with the cloth background. I was quite happy with this to start with, but after a white I realised I didn't like the soft waves of the cloth and also the shadows.
This shot has been taken without the lights. It's the kind of shot I was getting before I used the light tent and although it's OK, it would need a fair bit of adjustment before I was happy to use it.
There is a very subtle change in this photo compared to the one above. The background is very slightly brighter, thanks to the diffused light. The photo will still need tweaking to bring out the true colours of the item (it is still a puzzle to me why they are muted) but I'm a lot happier with the overall look.
For me, the light box produces the best results for lifestyle shots mainly because of the continuous length of cloth that gives a clean look. Moving the lights around (and even holding one or both above the light tent) really helps to achieve a nice light.
At times I'm still in two minds as to whether the light tent has been the Godsend I was hoping for, especially when I'm shooting on a sunny day in a room full of windows. However, on those very dull days, it has made a big difference.
I'm now finding it's hard for me to choose which photo I like best from a batch rather than which one will eventually look OK after lots of additional work - and that's a good thing 😊📷.
Tuesday, 18 October 2016
With Christmas in mind ...
To be more organised in my daily routine is always top of my New Year resolution list and I'd love to hear how you readers manage to fit your self-employed work alongside any other full time job you do, or other commitments you have. Does anyone else seem to find that photography, listing and marketing take up a huge amount of time? I often find my actual sewing starts in the early evening - how lovely it would be to be able to sew all day and have a fairy or two to do everything else required to run a business (including all the housework and cooking etc.)!
Tuesday, 15 March 2016
My love of Kawaii - all things cute
I didn't realise until quite recently that I have a love of rather cute things that take on a particular style - like the little rabbit head in my Easter themed bag charm. In Japan this is known as Kawaii (pronunciation and meaning here from the Urban Dictionary), and it wasn't until a couple of weeks ago, when I met up with Katie (a big anime/Manga and therefore Kawaii fan) that I learnt how to pronounce the word!
My realisation of my Kawaii love came to light when I had decided to pretty up my rather dull Filofax diary. Having seen some beautiful journals on Pinterest I started to realise that the things that really caught my eye were the cute journal entries. This lead me to source pretty stationery to form a Kawaii stationery board and naturally this progressed to finding adorable stationery to buy.
I had already been using Kawaii washi-tape to pretty up my packaging - there are hundreds of designs to choose from on Ebay. Now I have started my collection of Kawaii sticky notes, labels and stamps. The shop Tiger is an absolute favourite of mine - so many lovely little items (not just Kawaii) at excellent prices. It reminds me of the very early days of the Market Place at Ikea - the time before the only thing you come out with was a pack of tea-light candles!
It came to mind that cute things had often played a part in my life. As a teenager I'd spent many Saturday afternoons in a shop called Bizarre in Southend-on-Sea, just loving all the little darling bits and bobs available to buy. Along with my sister, I'd collect novelty erasers - never to be used, just to be admired (my two nephews now collect the modern day versions).
Two items I've kept in my "memories" box date back to my early teenage years. The fountain pen certainly came from Bizarre. Previous to this I'd had transparent blue and purple pens - the lids often split and would be kept in place with blue-tac! This one, although a little grubby, survived school life a little better. These pens took the very thin cartridges of ink that lasted a very short time. Remember cartridges? You'd keep spares in your school bag and they'd always leak somehow! These skinny ones were tougher and never leaked a drop.
The pretty pink writing case is very dear to me and has never been used until this year. I can't for the life of me remember if it was given to me or I bought it, but it was just too cute to use! The case is padded plastic with pretty flowers and two little children under an umbrella. Inside there's ten coloured pencils with the words "gentle treasures" and Kutsuwa on each one, there's also a sharpener and eraser. I've started using the pencils to draw in my diary - they're really lovely to use - nice and soft with good deep colour.
There's plenty of Kawaii sellers online and I believe a Kawaii shop is opening or has opened in Covent Garden. I can see me spending my pennies on many more cutesy items over the coming months.
The little anime character below is me! I made this many years ago when I first started blogging. You see - my love of the cute has been going on for a long time!
My realisation of my Kawaii love came to light when I had decided to pretty up my rather dull Filofax diary. Having seen some beautiful journals on Pinterest I started to realise that the things that really caught my eye were the cute journal entries. This lead me to source pretty stationery to form a Kawaii stationery board and naturally this progressed to finding adorable stationery to buy.
I had already been using Kawaii washi-tape to pretty up my packaging - there are hundreds of designs to choose from on Ebay. Now I have started my collection of Kawaii sticky notes, labels and stamps. The shop Tiger is an absolute favourite of mine - so many lovely little items (not just Kawaii) at excellent prices. It reminds me of the very early days of the Market Place at Ikea - the time before the only thing you come out with was a pack of tea-light candles!
It came to mind that cute things had often played a part in my life. As a teenager I'd spent many Saturday afternoons in a shop called Bizarre in Southend-on-Sea, just loving all the little darling bits and bobs available to buy. Along with my sister, I'd collect novelty erasers - never to be used, just to be admired (my two nephews now collect the modern day versions).
Two items I've kept in my "memories" box date back to my early teenage years. The fountain pen certainly came from Bizarre. Previous to this I'd had transparent blue and purple pens - the lids often split and would be kept in place with blue-tac! This one, although a little grubby, survived school life a little better. These pens took the very thin cartridges of ink that lasted a very short time. Remember cartridges? You'd keep spares in your school bag and they'd always leak somehow! These skinny ones were tougher and never leaked a drop.
The pretty pink writing case is very dear to me and has never been used until this year. I can't for the life of me remember if it was given to me or I bought it, but it was just too cute to use! The case is padded plastic with pretty flowers and two little children under an umbrella. Inside there's ten coloured pencils with the words "gentle treasures" and Kutsuwa on each one, there's also a sharpener and eraser. I've started using the pencils to draw in my diary - they're really lovely to use - nice and soft with good deep colour.
There's plenty of Kawaii sellers online and I believe a Kawaii shop is opening or has opened in Covent Garden. I can see me spending my pennies on many more cutesy items over the coming months.
The little anime character below is me! I made this many years ago when I first started blogging. You see - my love of the cute has been going on for a long time!
Thursday, 18 February 2016
Photography
In my last entry I mentioned that I was taking part in the Etsy Resolution 2016. I have to admit, I've been a bit slack keeping up with the webinars and online sessions, but I'm getting there! The two sessions I've completed covered photography and SEO and with all the other informative links posted I found my mind was beginning to explode from too much reading, digesting and updating!
I managed to get more work and learning done over a 1/2 hour cuppa at a well known coffee shop than most days at home - becomes a little expensive though!
So, pushing SEO aside (I won't blog about that, it'll bore you stupid), I thought I'd talk about the photography side of things.
I imagine a vast majority of online sellers have issues with photography - it's the a bug-bear of many (alongside correct pricing). Lighting is most definitely an issue, especially during the Winter months, and then there's the sharpness of the picture and the good representation of the colours.
Along with the obvious (pictures in focus and relatively close up), a number of different shots can enable the potential buyer to get a good idea of the item they are interested in. We have to remember that a potential buyer can't pick up the item and feel it, seeing it close up and at different angles by turning it in their hands or placing it against, say, an outfit (if it's jewellery). They need to work out the sizing of the item too, even if we include measurements in the description, a visual idea of sizing goes a long way. A number of different shots were suggested:
(1) a "studio" shot with plain background (not necessarily white, just one that means the focus is on the object itself). I read elsewhere that a white background is good if you're hoping to attract the attention of magazines as these are the kind of photos they'll be looking for. However, I've also seen that a stark white background is not always pleasing to the eye - a slightly grey tinge may be better (huge relief: I've often felt grey tinged backgrounds were personally easier for me to view). To achieve a crisper studio shot, try using FotoFuze - it's very quick and easy to use and you can achieve a brilliant white, or grey tinge if you prefer it.
(2) a really close up shot so show the detail in your work. I've had comments from customers saying that the item they'd bought was much more detailed than they realised, so for me to perfect the ability to get a good close up would be a bonus.
(3) a photo that'll give the impression of item size. Quite easy for jewellery, but worth thinking about for all items.
(4) the lifestyle picture - so potential buyers can get an idea of their possible new item in an everyday setting. A very good photo can actually push that potential buyer to become an actual buyer if you set the photo up to really sell your product (a trick of the mind perhaps).
With this knowledge under my belt, and a sunny day at my disposal, I decided to have a play with the camera and do a photo shoot for my new brooches. I generally include a studio shot of front and back for my brooches, together with a packaging shot but thought I'd have a go at more natural setting. Having read this helpful article on camera/photo techniques (although my ageing D70 doesn't seem to go down any further than f4.5), I ran off the following shots:
The background objects are blurred, as I wanted, but they are too tall and the coloured vase at the front is distracting - you don't "see" the brooch.
The positioning of the brooch is better, being closer to the background objects which remain blurred. The bottle is still too tall in that your eye immediately goes to that first, rather than the brooch. I liked the books, but wasn't sure if the floral notebook was too busy.
Still not happy. OK, we've lost the tall bottle so the eye is at a better level, but the brooch is distanced from the background so it doesn't flow, your eye is more interested in the background than the foreground.
My final attempt (and the one I've used for my product). Yes, the vase is tall but it seems to lead your eye down to the plant and then on to the brooch. There's continuity between the green on the brooch and the green of the plant so there's less competition for the eye (does that make sense?). I quite liked this photo, it seems peaceful and follows a natural theme to complement the nature depicted in the item.
Do you find it a challenge taking good shots for your products or is it something that comes naturally to you? Would love to hear your views and any tips.
I managed to get more work and learning done over a 1/2 hour cuppa at a well known coffee shop than most days at home - becomes a little expensive though!
So, pushing SEO aside (I won't blog about that, it'll bore you stupid), I thought I'd talk about the photography side of things.
I imagine a vast majority of online sellers have issues with photography - it's the a bug-bear of many (alongside correct pricing). Lighting is most definitely an issue, especially during the Winter months, and then there's the sharpness of the picture and the good representation of the colours.
Along with the obvious (pictures in focus and relatively close up), a number of different shots can enable the potential buyer to get a good idea of the item they are interested in. We have to remember that a potential buyer can't pick up the item and feel it, seeing it close up and at different angles by turning it in their hands or placing it against, say, an outfit (if it's jewellery). They need to work out the sizing of the item too, even if we include measurements in the description, a visual idea of sizing goes a long way. A number of different shots were suggested:
(1) a "studio" shot with plain background (not necessarily white, just one that means the focus is on the object itself). I read elsewhere that a white background is good if you're hoping to attract the attention of magazines as these are the kind of photos they'll be looking for. However, I've also seen that a stark white background is not always pleasing to the eye - a slightly grey tinge may be better (huge relief: I've often felt grey tinged backgrounds were personally easier for me to view). To achieve a crisper studio shot, try using FotoFuze - it's very quick and easy to use and you can achieve a brilliant white, or grey tinge if you prefer it.
(2) a really close up shot so show the detail in your work. I've had comments from customers saying that the item they'd bought was much more detailed than they realised, so for me to perfect the ability to get a good close up would be a bonus.
(3) a photo that'll give the impression of item size. Quite easy for jewellery, but worth thinking about for all items.
(4) the lifestyle picture - so potential buyers can get an idea of their possible new item in an everyday setting. A very good photo can actually push that potential buyer to become an actual buyer if you set the photo up to really sell your product (a trick of the mind perhaps).
With this knowledge under my belt, and a sunny day at my disposal, I decided to have a play with the camera and do a photo shoot for my new brooches. I generally include a studio shot of front and back for my brooches, together with a packaging shot but thought I'd have a go at more natural setting. Having read this helpful article on camera/photo techniques (although my ageing D70 doesn't seem to go down any further than f4.5), I ran off the following shots:
The background objects are blurred, as I wanted, but they are too tall and the coloured vase at the front is distracting - you don't "see" the brooch.
The positioning of the brooch is better, being closer to the background objects which remain blurred. The bottle is still too tall in that your eye immediately goes to that first, rather than the brooch. I liked the books, but wasn't sure if the floral notebook was too busy.
Still not happy. OK, we've lost the tall bottle so the eye is at a better level, but the brooch is distanced from the background so it doesn't flow, your eye is more interested in the background than the foreground.
My final attempt (and the one I've used for my product). Yes, the vase is tall but it seems to lead your eye down to the plant and then on to the brooch. There's continuity between the green on the brooch and the green of the plant so there's less competition for the eye (does that make sense?). I quite liked this photo, it seems peaceful and follows a natural theme to complement the nature depicted in the item.
Do you find it a challenge taking good shots for your products or is it something that comes naturally to you? Would love to hear your views and any tips.
Wednesday, 27 January 2016
Intentions, goals and achievements
With 2015 firmly behind us (and nearly at the end of January already), I've been inspired to set some "intentions, goals and achievements" for my shop - thanks to an Etsy blog post that pinged into my email box.
It's quite easy to slow down once the rush of Christmas has passed and family life kicks in again, so having a few goals, a bit like resolutions, will hopefully keep me creating and listing in these quieter few months.
Having taken a few weeks to think through my list of goals and how I could possibly achieve them, I've come up with five. There's some, like adding new ideas, which are very achievable (like the boat brooch with an original phrase printed on it) and others that will need a little push to get there! This, I think, this is the whole idea - don't set too many really difficult goals as you'll lose faith and give up. By reviewing the intentions and goals regularly (perhaps give a review date/deadline), you can alter them if need be to either become more achievable, extend the intention to make it harder or, ticked off as a big achievement already!
One of the suggestions in the blog post was to aim to increase sales by a percentage each year. It was an interesting project comparing the number of sales through Folksy, Etsy, bricks/mortar and private buyers through 2014/15 and then 2015/16 (to date). It was great to see I've already increased my total sales, especially through Etsy, so I've set my intention to a 10% rise on 2014/15 (April to April) and will need to get five more orders in the next two and a bit months. They may not sound many, but for me, that's quite a few and enough to make me get out there and market a little more and try and increase the number of items available to purchase.
Doing this little project, as well as taking part in the Etsy Resolution 2016, is certainly giving me that little zing! A kind of warm buzz that's often needed to keep motivation going.
Hope you are all doing well in your new year resolutions. Do any of you have goals for 2016? A change in direction perhaps, or something exciting to look forward to? Pop in a comment to let me know :-)
It's quite easy to slow down once the rush of Christmas has passed and family life kicks in again, so having a few goals, a bit like resolutions, will hopefully keep me creating and listing in these quieter few months.
Having taken a few weeks to think through my list of goals and how I could possibly achieve them, I've come up with five. There's some, like adding new ideas, which are very achievable (like the boat brooch with an original phrase printed on it) and others that will need a little push to get there! This, I think, this is the whole idea - don't set too many really difficult goals as you'll lose faith and give up. By reviewing the intentions and goals regularly (perhaps give a review date/deadline), you can alter them if need be to either become more achievable, extend the intention to make it harder or, ticked off as a big achievement already!
One of the suggestions in the blog post was to aim to increase sales by a percentage each year. It was an interesting project comparing the number of sales through Folksy, Etsy, bricks/mortar and private buyers through 2014/15 and then 2015/16 (to date). It was great to see I've already increased my total sales, especially through Etsy, so I've set my intention to a 10% rise on 2014/15 (April to April) and will need to get five more orders in the next two and a bit months. They may not sound many, but for me, that's quite a few and enough to make me get out there and market a little more and try and increase the number of items available to purchase.
Doing this little project, as well as taking part in the Etsy Resolution 2016, is certainly giving me that little zing! A kind of warm buzz that's often needed to keep motivation going.
Hope you are all doing well in your new year resolutions. Do any of you have goals for 2016? A change in direction perhaps, or something exciting to look forward to? Pop in a comment to let me know :-)
Tuesday, 22 December 2015
A big thank you to you all
What a year! Thank you all for your support and custom throughout 2015.
Ellie's Treasures has had a busy few months leading up to Christmas. It's been wonderful making special custom items and stocking my two shops with gift ideas for the festive season. Ellie's Treasures will remain open throughout the festive season for treats for yourself and others - the beauty of being online! Any orders will be mailed 1st class whenever the Post Office is open.
This year has seen one venture close and another open. New ideas continue to flood my head ready to be turned into reality. Brooches, keyrings and bag charms with original little printed phrases are beginning to creep into the shop. Each item is original but with these printed words, they are truly original, no two will be the same unless requested to be. Another new idea was to use the little hanger charms to make fun mini Christmas decorations. The hangers are so detailed they are just too cute to not use. With hand drawn and coloured embellishments also being a new idea, the two seemed to go very well together.
Keep a look out for additional new ideas at Ellie's Treasures as the year progresses. Here's to a happy and healthy 2016 to you all.
Ellie's Treasures has had a busy few months leading up to Christmas. It's been wonderful making special custom items and stocking my two shops with gift ideas for the festive season. Ellie's Treasures will remain open throughout the festive season for treats for yourself and others - the beauty of being online! Any orders will be mailed 1st class whenever the Post Office is open.
This year has seen one venture close and another open. New ideas continue to flood my head ready to be turned into reality. Brooches, keyrings and bag charms with original little printed phrases are beginning to creep into the shop. Each item is original but with these printed words, they are truly original, no two will be the same unless requested to be. Another new idea was to use the little hanger charms to make fun mini Christmas decorations. The hangers are so detailed they are just too cute to not use. With hand drawn and coloured embellishments also being a new idea, the two seemed to go very well together.
Keep a look out for additional new ideas at Ellie's Treasures as the year progresses. Here's to a happy and healthy 2016 to you all.
Saturday, 15 August 2015
Summertime ... things are slow ...
so I'm taking the opportunity to have a bit of a play with how my shops look online, update information and have a re-read of relevant SEO help and selling best practise.
Okay, so that all sounded very enthusiastic and professional. Indeed the various links have been up on my laptop as I sew, but I confess there has been little reading and more watching ... I discovered the entire three series of Just Good Friends on You Tube and got hooked (Paul Nicholas was my absolute heart-throb as a teenager and I still have a soft spot for him). Watching these back to back, hearing the theme tune over and over has resulted in lack of sleep due to my brain constantly playing the song in my head. In a way, I'm pleased I've now finished the last episode - I can go back to watching the various TV catch up services - random progs of interest - and get rid of that darn tune!!
So, back to the "relevant reading". I've come across a few excellent, helpful, articles on line:
For those with an Etsy shop I found this blog post by Erin Heaton, "14 tips from my first year selling on Etsy" very helpful indeed. It's well written, easy to digest and has an additional link to basic SEO info for Etsy too - bonus! You'll find you can't help but pop over and check out Erin's lovely shop while you're there.
This next article is a blog post from Folksy about pricing your work. It's an area many will find difficult, including myself. Occasionally I'll supply a shop with a small wholesale order and it's this that got me searching for a pricing update. This blog post runs through everything about wholesale vs retail when it comes to pricing. It's an interesting read and one I really need to start taking on board.
This last link I haven't yet read - it's a biggie! From the website Moz, it's titled "The Beginner's Guide to SEO" and should be an enlightening read ... when I really have nothing else to do/watch/concentrate on!
Tweaking my shop has been fun. Katie designed my new header (shown above) and small images (she's still tweaking one of them ... you know what it's like ... "working" with your 18 year old daughter). I also decided to update my photo as it was long overdue. Armed with my iphone, hair brushed and lippy applied, I headed out into the garden to snap away. Felt a bit weird really ... I'm not one to take selfies and when I do I cringe at the results!
I see I took 81 photos which meant lots of sifting through, experimenting with black/white, sepia, contrast, brightness etc., and then narrowing it down to a few that were decent. I'd chosen some with my specs, some without, hair tied back, hair loose, sultry look (well, sort of), smiley look ... then got my nearest and dearest to pick.

I agreed with his choice to start with...
but then switched to a smiley pic in the end and am happy with how it looks.
It's the first time I've taken a photo wearing my glasses (which I rely on more and more these days due to the close work needed for sewing). Not many people have seen me with my specs on, so it was a bit of a surprise for them!
Hope you're all enjoying your summer and keeping busy.
PS - I just have to add this link to another exceptionally helpful blog ... it's right up there as one of the most inspirational blogs for craft sellers.
Okay, so that all sounded very enthusiastic and professional. Indeed the various links have been up on my laptop as I sew, but I confess there has been little reading and more watching ... I discovered the entire three series of Just Good Friends on You Tube and got hooked (Paul Nicholas was my absolute heart-throb as a teenager and I still have a soft spot for him). Watching these back to back, hearing the theme tune over and over has resulted in lack of sleep due to my brain constantly playing the song in my head. In a way, I'm pleased I've now finished the last episode - I can go back to watching the various TV catch up services - random progs of interest - and get rid of that darn tune!!
So, back to the "relevant reading". I've come across a few excellent, helpful, articles on line:
For those with an Etsy shop I found this blog post by Erin Heaton, "14 tips from my first year selling on Etsy" very helpful indeed. It's well written, easy to digest and has an additional link to basic SEO info for Etsy too - bonus! You'll find you can't help but pop over and check out Erin's lovely shop while you're there.
This next article is a blog post from Folksy about pricing your work. It's an area many will find difficult, including myself. Occasionally I'll supply a shop with a small wholesale order and it's this that got me searching for a pricing update. This blog post runs through everything about wholesale vs retail when it comes to pricing. It's an interesting read and one I really need to start taking on board.
This last link I haven't yet read - it's a biggie! From the website Moz, it's titled "The Beginner's Guide to SEO" and should be an enlightening read ... when I really have nothing else to do/watch/concentrate on!
Tweaking my shop has been fun. Katie designed my new header (shown above) and small images (she's still tweaking one of them ... you know what it's like ... "working" with your 18 year old daughter). I also decided to update my photo as it was long overdue. Armed with my iphone, hair brushed and lippy applied, I headed out into the garden to snap away. Felt a bit weird really ... I'm not one to take selfies and when I do I cringe at the results!
I see I took 81 photos which meant lots of sifting through, experimenting with black/white, sepia, contrast, brightness etc., and then narrowing it down to a few that were decent. I'd chosen some with my specs, some without, hair tied back, hair loose, sultry look (well, sort of), smiley look ... then got my nearest and dearest to pick.

I agreed with his choice to start with...
but then switched to a smiley pic in the end and am happy with how it looks.
It's the first time I've taken a photo wearing my glasses (which I rely on more and more these days due to the close work needed for sewing). Not many people have seen me with my specs on, so it was a bit of a surprise for them!
Hope you're all enjoying your summer and keeping busy.
PS - I just have to add this link to another exceptionally helpful blog ... it's right up there as one of the most inspirational blogs for craft sellers.
Monday, 17 September 2012
New charms ...
I had a little flurry of sales recently, so, as any business person knows, money in also means money out - purchasing new items specifically to help boost the business. I've bought five new bags of tibetan silver charms (one hasn't yet arrived), so this can only mean one thing - a selection of fun new items to make for Ellie's Treasures.
I have ballerinas, back-arched cats (perfect for Hallowe'en), simple houses and little dolphins.

I have good ideas for three of the new charms, but need a little inspiration for the ballerinas! Sounds strange doesn't it, but I'm not too sure yet how to feature them other than on a stage. Got any ideas readers?
My fifth bundle of new charms I'm going to keep under wraps for now. I have a whole new set of ideas for these and don't want to spill the beans too quickly - will need to dabble and play before I say anything!
I've been working on some hand applique these last few weeks - Christmas samples for a potential order. It's quite fiddly I have to say, all the cutting out, starching and turning over of the seams using a hot iron, but the sewing is great fun, like putting a jigsaw puzzle together. I love using different fabrics to make up each picture too. I won't show you any photos yet, as I haven't yet heard back from the customer but I'll post some up in due course.
This new little teddy bear brooch is a mini applique and I'm rather pleased with him - he's got such a lovely face and looks very cuddly!
I have ballerinas, back-arched cats (perfect for Hallowe'en), simple houses and little dolphins.
I have good ideas for three of the new charms, but need a little inspiration for the ballerinas! Sounds strange doesn't it, but I'm not too sure yet how to feature them other than on a stage. Got any ideas readers?
My fifth bundle of new charms I'm going to keep under wraps for now. I have a whole new set of ideas for these and don't want to spill the beans too quickly - will need to dabble and play before I say anything!
I've been working on some hand applique these last few weeks - Christmas samples for a potential order. It's quite fiddly I have to say, all the cutting out, starching and turning over of the seams using a hot iron, but the sewing is great fun, like putting a jigsaw puzzle together. I love using different fabrics to make up each picture too. I won't show you any photos yet, as I haven't yet heard back from the customer but I'll post some up in due course.
This new little teddy bear brooch is a mini applique and I'm rather pleased with him - he's got such a lovely face and looks very cuddly!
Monday, 18 June 2012
Snap shot ...
For this last week:

My orchid has bloomed (remember the post not so long ago?) - isn't it beautiful?

Etsy have added something new for shop owners - an "About" page. I put my thinking cap on and put together a few words about my crafting life from beginning to now. I'm rather proud of it, and just love the way we're able to add four photos to illustrate our lives and work (the one above has been included). Hope you like it, it provides a little snap shot of me!

I made this summery boat hanging for my Dad for Father's Day. Shall be using these cute boat charms in key rings and brooches soon - watch out for them.

Ben took part in his first ju-jitsu demonstration at the weekend. It wasn't the best weather, very dull and blustery, but at least the rain held off until it was all over and ice-creams had been enjoyed! He was very nervous about being part of the demo squad (as they call themselves), but I know he had a fun time in the end and liked showing others his skills.
My orchid has bloomed (remember the post not so long ago?) - isn't it beautiful?
Etsy have added something new for shop owners - an "About" page. I put my thinking cap on and put together a few words about my crafting life from beginning to now. I'm rather proud of it, and just love the way we're able to add four photos to illustrate our lives and work (the one above has been included). Hope you like it, it provides a little snap shot of me!
I made this summery boat hanging for my Dad for Father's Day. Shall be using these cute boat charms in key rings and brooches soon - watch out for them.
Ben took part in his first ju-jitsu demonstration at the weekend. It wasn't the best weather, very dull and blustery, but at least the rain held off until it was all over and ice-creams had been enjoyed! He was very nervous about being part of the demo squad (as they call themselves), but I know he had a fun time in the end and liked showing others his skills.
Labels:
Ellie's Treasures: general,
Family: life
Subscribe to:
Posts (Atom)